Slip Stitch Join Tutorial
Today’s tutorial will show you how to join any two pieces of crochet with the slip stitch join. This join, unlike most others, has an added benefit of being able to join your pieces anywhere throughout the work. You can join the edges, the middles, or anywhere in between. If you would prefer a video tutorial of this join click here.
The first step is to decide where and what you will join. For this tutorial I’m going to join the edge, so I first put the right sides together.

Note: You don’t always have to put the right sides together when using this join, especially if you are joining in other places than the edges. The only thing to remember is that you need to start the first stitch near an edge because you will have one yarn over that will wrap around the both pieces.
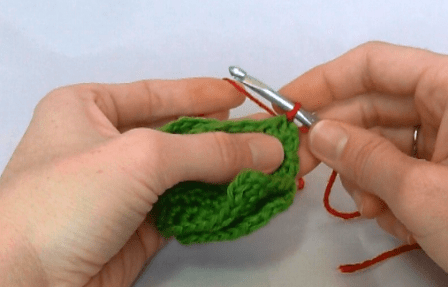
Next, I insert my hook where I want to begin my join.

Note: You can also insert your hook through just the inside or outside loops of each side for a different effect.
Now, yarn over and pull the loop back through the pieces and through the loop on your hook.

Before moving on to the next stitch, be sure to tighten the one you just made down.

Continue in the next stitch or space that you want to join and work your way across the edge or area you want to join.

Here is a view of the backside of the join. If you are using this stitch to join things other than edges and want it visible, you can choose between the two sides that you want for the front.

Once I open the pieces up you can see where the join shows up in the contrasting color I used.

One thing to know about this join is that the resulting edge (if that is what you are joining) will be slightly raised. If you need a flat seam with no raised edging, you would be better off using the Mattress stitch join or Whipstitch join.

What’s your favorite kind of join? Let me know below and thanks for stopping by!


One Comment
Cranky Otter
Thanks for all the join stitches. I prefer a crochet hook to a needle for joining but can’t always cope with the raised seam. And while I may have seen mattress stitch before, I forgot and didn’t know I could tighten it at the end. And as straightforward as some joins are, I really appreciate your showing the front, back, and edge in contrasting colors so I can pick the stitch for the effect I want. Most stitch reminders in books just explain the stitch but without pictures. Your explanations are both thorough and straightforward. Unlike this comment:)
Got to your site from the linked double crochet (my dad complains that his toes push through my blankets…) and then watched several videos. Good stuff, nice problem solving! No ore gaps!