Working Fair Isle Crochet in Rows

I keep getting asked by people if it’s possible to use Fair Isle crochet in rows instead of the round. The simple answer is yes, and this tutorial will show you the basics of how to do it. However, before we begin there are a few important things I should mention before you run off and try this technique.
Most of the people that were looking for this tutorial wanted to convert a pattern they already had that was originally made for intarsia or tapestry crochet. This can definitely be done but remember that Fair Isle crochet usually has short color runs (that are patterned in the round) and a tapestry or intarsia pattern might have long color changes (which are easily accomplished when you run the tails inside the stitches). Changing to Fair Isle can leave you will long floats that need to be caught often to prevent snags (see tutorial for how to do this).
Also because you will have floats along the back of your project, you will most likely need to put a backing on it. Either a solid piece of crochet fabric, or you can even sew a lining on your project (like a fleece backing on a baby blanket).
So now lets get on with the tutorial. I also have a video tutorial available on this information found here.

So when you work Fair Isle crochet in rows, you want to keep all your floats on one side. I’m not going to go over the basics of Fair Isle, you can find those tutorials here. This is just going to show you how to keep your floats all on the wrong side of your fabric.
After you finish your first row of actual Fair Isle crochet and turn your work you will have the wrong side facing you.

Now you will work your pattern as written up to your first color change. Normally, you would just drop the main color and join the contrasting color, but if you do this, your mail color float will be on the “right side” of your fabric. We definitely don’t want that.

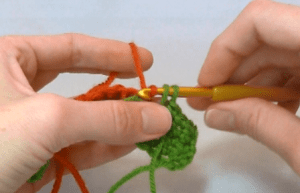
Instead of leaving the tail behind like we normally would, you will instead bring it under your hook and to the front of the work.

Next, pick up your contrasting color and join it to change color.

Now, if it is necessary to catch a float because your stitch run is longer than 7 STS (my recommended stitch run for catching floats), before you insert your hook into your next stitch (the one you wanna catch your float on), bring the float between your hook and next stitch you are going to work into.

Then insert your hook into the next stitch.

We can’t leave the float where it is because it will be sticking out on the “right side” of our project, so now we need to bring it back to the front of our work laying over the hook.

Now, pull up your loop and finish off your single crochet to catch the float.

Then continue on with your pattern and change colors as it calls for. Just remember at every color change, bring that tail to the front of the work. Then work the Fair Isle as usual when the “right side” is facing you.


